Upload images from an S3 bucket
If you have uploaded images on an S3 bucket, you can import these images to Arkindex in a few steps.
Get access to the bucket from Arkindex
In order to import images from a bucket into an Arkindex instance, you first need to ask an administrator of that instance to grant you access to the S3 import feature.
Create a new Arkindex project
Your images must be imported into a project: you can create a new one by clicking the New project button in the top-right corner of the Arkindex homepage. To create a project, you only need to fill in a project name, and optionally a description.
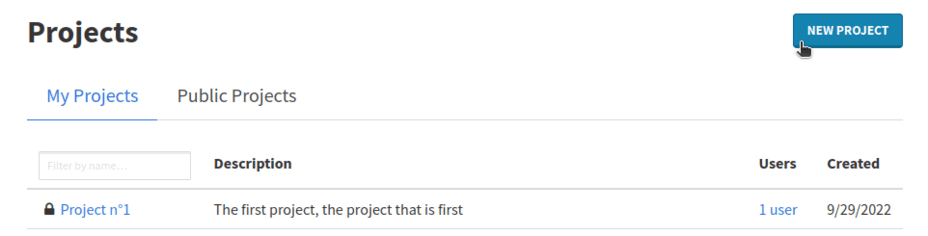
You can also import your images into an existing project.
Import images from a bucket to an Arkindex project
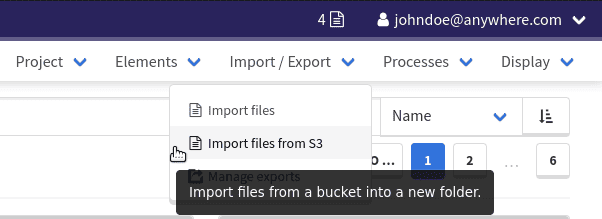
In order to access the S3 import interface, you need to navigate into your project, and from there click on .
By default, an S3 import will create a new folder automatically to place all of the imported images. If you wish to create your own folder, use , then open your folder and click on .
This opens the S3 import configuration page. This page will allow you to set various options on the system worker that will perform the import. The exact configuration fields shown are defined by this worker, and thus may vary depending on the version of this worker.
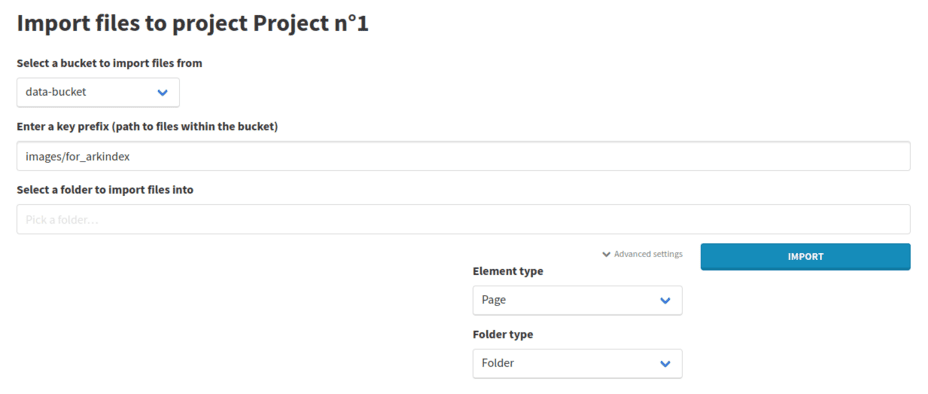
Bucket selection
You will need to select the bucket your images are in from a dropdown.
If your bucket isn’t listed, you need to ask an administrator of the Arkindex instance to give Arkindex access to that bucket.
Optional key prefix
You can also specify a key prefix to only import some of the files in the bucket.
For example, if you enter the prefix folder1/myfiles then files with names such as folder1/myfiles/1.jpg will be imported, as would a file named folder1/myfiles.png.
Optional key suffixes
You can specify one or more key suffixes. Those allow you to only import files from the bucket whose names end with those suffixes.
This is typically used to filter files by extension: using the .jpg and .png suffixes will restrict the import to JPEG and PNG files.
Advanced settings
By opening the Advanced settings dropdown, you can specify the types of the elements that will be created by the import. By default, Page elements are created from the imported images, and the created folder is of type Folder.
In Enterprise Edition, you can also select the farm on which the import will be executed.
Run the import
Once you have filled out the configuration form, you can click on Import to start the import. This takes you to the Process status page, from where you can monitor your import’s progress.
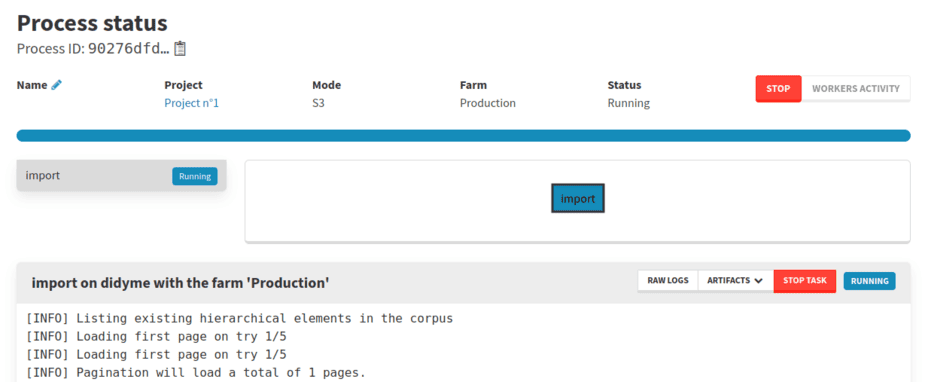
You can leave this page and find it again from the Process list, which you can access by clicking on Process in the main menu bar at the top of the website.
Use created elements on Arkindex
Once the import is complete, you can browse the created elements, annotate them, or process them using machine learning workers.